That shoebox of old family photos in your closet probably needs attention. The images might look dusty, smudged, or slightly grimy. You want to clean them, but you’re also terrified of making things worse.
That fear is completely reasonable. These photos can’t be replaced. Once they’re damaged, they’re damaged forever. So before you touch anything, it helps to know what cleaning really means when it comes to fragile old photographs.
Here’s the truth: you’re not going to make these photos look brand new. What you can do safely at home is remove loose surface dust and handle them in ways that prevent further damage. That’s it. And honestly, that’s enough to make a real difference.
Some problems can’t be fixed at home. If your photos are sticky, peeling, have mold growing on them, or show water damage, cleaning them yourself will likely make things worse. The same goes for photos that are already crumbling or extremely brittle. In those cases, a professional conservator is your best option.
But if you’re dealing with photos that just need a gentle dust-off or careful handling, you can absolutely do that yourself. The key is knowing when to act and when to stop. This guide will walk you through simple, safe methods that won’t put your irreplaceable memories at risk. You’ll learn what tools to use, what motions are safe, and most importantly, when it’s time to set a photo aside and leave it alone.
First, decide whether cleaning is actually safe
Before you touch anything, take a close look at each photo. Some old photographs are just too fragile for home cleaning, no matter how gentle you plan to be. The biggest mistake people make is assuming every photo can handle a little careful attention.
Watch for flaking or peeling on the image surface. If tiny pieces of the photo are lifting away or if you see cracks in the image layer itself, stop right there. The same goes for photos stuck to glass, album pages, or other photos. Trying to separate them at home almost always causes more damage.
Heavy mold is another red flag. A few small spots might be manageable, but if you see fuzzy growth or the photo smells strongly musty, it needs professional help. Water damage creates similar problems. Photos that are warped, curled into tight rolls, or show tide lines from old water exposure are often too brittle to clean safely.
If the paper backing feels stiff and breaks easily when you gently flex a corner, that’s brittle paper. It can snap or tear with very little pressure.
So what do you do with photos that fail these tests? The answer is simple: leave them alone. Put each fragile photo in its own protective sleeve or archival envelope. Store it somewhere cool and dry, away from the others. Then make the best digital scan you can, even if the photo looks damaged. That scan becomes your working copy while the original stays safe and untouched. Sometimes doing nothing is exactly the right move.
Set up a clean workspace that won’t cause new damage
Before you touch a single photograph, take five minutes to set up properly. This step alone prevents most accidental damage that happens during home cleaning.
Start with a clean, flat table in a room with good lighting. You need to see what you’re doing without squinting or casting shadows over your work. Natural light from a window works great, or use a decent lamp.
Wash your hands thoroughly and dry them completely. Even clean-looking hands carry oils that can leave permanent marks on old photos. If you’re working with glossy or especially delicate prints, wear clean nitrile gloves instead. You can find these at any pharmacy.
Clear everything off your table except what you need. No coffee cups, no snacks, no water bottles. One spill can destroy years of memories in seconds. If you have pets, work in a room where you can close the door. A curious cat walking across your great-grandmother’s wedding photo is not a risk worth taking.
Keep a clean piece of cardboard or stiff paper nearby to use as a support board. Never pick up fragile photos with just your fingers. Slide them onto the board first, then move them. Always handle photos by their edges, and keep them flat rather than bending or flexing them.
Work on one photo at a time. Spreading out your entire collection creates chaos and increases the chance something gets damaged. High humidity makes old photos sticky and more likely to tear, so avoid steamy kitchens or bathrooms. And here’s the most important part: don’t rush. Hurrying is when mistakes happen. If you feel tired or distracted, stop and come back later.
Use dry, gentle cleaning first because it’s the lowest risk
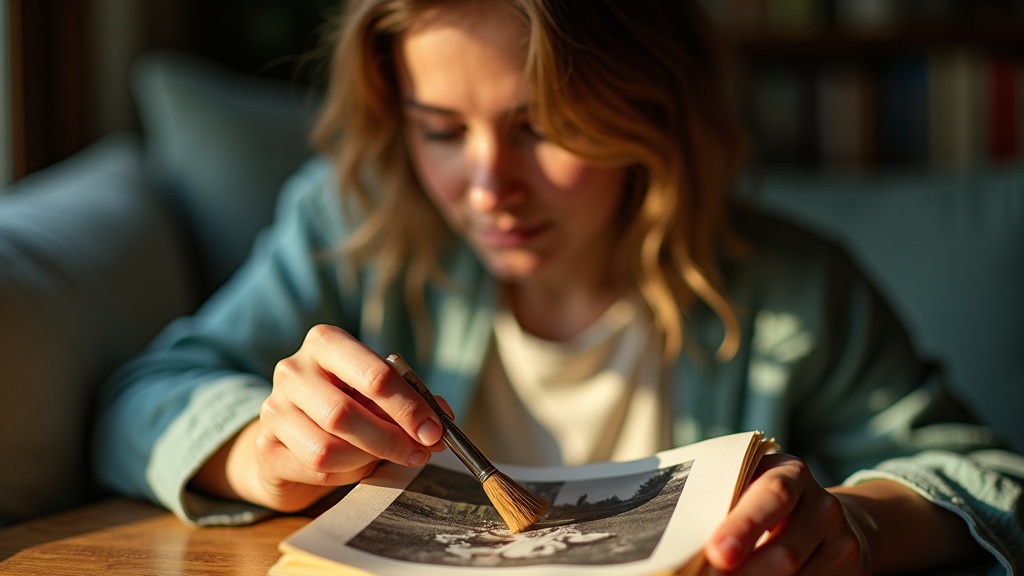
Before you reach for any kind of liquid or cleaning product, start with the simplest approach: removing loose dust. Most of the grime on old photos is just sitting on the surface, not actually stuck to it. A gentle brush or puff of air can lift away years of accumulated dust without ever touching the image itself.
Use a very soft brush, like a clean makeup brush or a special photography brush with fine bristles. Hold the photo carefully with one hand underneath to support it. Start from the center and work outward in smooth, gentle strokes. The key is to brush the dust off the photo, not push it around in circles. If you’re worried about scratching, you can use a small blower bulb instead, the kind photographers use to clean camera lenses.
Pay attention to how the photo responds. If dust lifts away easily, keep going. If you feel any resistance or the brush starts to catch on the surface, stop immediately. That catching feeling means something is stuck, not just resting on top, and forcing it could damage the photo.
Some dirt won’t budge with dry cleaning, and that’s okay. Stuck-on grime, sticky residue, or stains that have bonded to the photo surface need a different approach or might need to stay put. Trying to scrub them off with a brush will only make things worse. The goal here is to remove what comes off easily and safely, nothing more.
Avoid anything abrasive or forceful. Don’t use canned air up close because the pressure can damage delicate surfaces. Skip paper towels, which are surprisingly rough. And never use erasers, even the soft ones, because they can smear or remove part of the image along with the dirt.
Why water and household cleaners are usually a bad idea
When you see a dusty old photograph, the instinct to wipe it down with a damp cloth feels natural. We clean almost everything else in our homes that way. But old photos aren’t like kitchen counters or picture frames. They’re built from layers of delicate materials that react badly to moisture.
Water is the big troublemaker here. Even a tiny amount can make the paper backing swell and warp. It can also soften or dissolve the emulsion, which is the thin coating on the front that holds the actual image. Once that emulsion gets wet, it can lift away from the paper, blur, or develop permanent tide marks that look like faint rings or stains. Some older prints also have surface coatings that turn sticky when damp, and once that happens, dust and fingerprints become nearly impossible to remove.
Household cleaners make things worse. Glass cleaner might seem harmless since we use it on framed art, but it contains ammonia and other chemicals that can strip away protective layers or fade images. Rubbing alcohol dries out paper and can dissolve inks. Vinegar is acidic and eats away at fragile materials over time. Baby wipes, disinfectant sprays, and anything with soap or oils leave behind residues that attract dirt and speed up deterioration.
Even products labeled as gentle can cause trouble. The issue isn’t always what’s in the cleaner. It’s that fragile old photographs simply can’t handle moisture or chemical exposure the way modern prints can. What seems like a quick, harmless wipe can lead to damage you can’t undo.
What to do with common problems like fingerprints, stuck dust, and mold
Sometimes a gentle brush isn’t enough. Old photos can have fingerprints, stubborn grime, or worse. Here’s how to think through the most common problems without making things worse.
If you see fingerprints on a glossy photo, resist the urge to wipe them off. Rubbing can scratch the surface or smear oils deeper into the image. Your best move is to handle the photo only by its edges from now on. If the fingerprints bother you, consider scanning or photographing the image as it is. You’ll have a clean digital copy, and the original stays untouched.
Sticky residue or grime that won’t brush away is trickier. Don’t scrape at it with your fingernail or a tool. That can lift the photo emulsion right off the paper. If light cleaning doesn’t work, stop. Store the photo safely and decide later if you want professional help. Getting a good scan now means you haven’t lost anything by waiting.
Mold or mildew is the one problem you really shouldn’t handle casually. Those fuzzy spots or discolored patches can release spores into the air. Don’t brush mold indoors where spores can spread to other photos or surfaces. Instead, isolate the affected photo in a breathable container like a paper envelope. Keep it away from your other pictures. Mold cleanup is best left to professionals who have the right equipment and workspace.
If photos are stuck together, don’t try to peel them apart. You’ll almost certainly tear them. Leave them as they are and get professional advice.
When in doubt, capture first and clean later. A scan or even a careful phone photo preserves what matters most: the image itself.
When it’s worth calling a professional conservator
Some photos need more help than you can safely give them at home. Knowing when to stop is just as important as knowing how to start.
If you see the image layer itself flaking or peeling away from the paper beneath, don’t touch it. If a photo has been through serious water damage with visible staining, warping, or tide marks, it’s beyond home care. Active mold that looks fuzzy or powdery is a health risk and needs professional handling.
Photos stuck to glass are especially tricky. They might seem like they just need a gentle tug, but separating them incorrectly destroys the image. The same goes for prints that have become so brittle they’re tearing at the edges or crumbling when you pick them up.
If you have a one-of-a-kind image with real sentimental or historical value, don’t experiment on it. The same rule applies if you’re looking at a photo with a strange coating or finish you don’t recognize. When in doubt, leave it alone.
Here’s the simplest test: if the photo gets worse as you gently handle it, stop immediately.
A conservator is a trained specialist who works with fragile historical materials. They have tools, training, and controlled environments you don’t have at home. To find good help, ask specifically about their experience with photographs, not just paper or art in general. Describe what you’re seeing in detail before you bring anything in. A reputable conservator will explain your options honestly, including whether treatment is worth it at all. They should answer questions patiently and never pressure you into expensive work you don’t need.
Preserve the photos after cleaning so you don’t have to clean again
Once your photos are clean, a few simple habits will keep them that way for decades. The goal is to protect them from the things that caused the dirt and damage in the first place: dust, moisture, light, and rough handling.
Store your photos in a cool, dry, dark place. That means somewhere in the main part of your house, not the attic or basement. Attics get too hot. Basements get too damp. Both invite mold and warping. A closet shelf or drawer in a climate-controlled room works perfectly.
Put each photo in its own protective sleeve or envelope. You can find photo-safe options at craft stores or online. These keep photos from sticking together and shield them from fingerprints and dust. If you’re stacking photos, the sleeves also prevent them from scratching each other.
Never use rubber bands, paper clips, or tape directly on photos. Rubber bands decay and leave sticky residue. Tape damages the surface when you try to remove it. Stay away from old magnetic albums with sticky pages, too. They yellow and trap photos in a way that’s nearly impossible to undo.
If you need to label a photo, use a soft pencil on the back edge, pressing gently. Or better yet, write on the sleeve or envelope instead. This avoids any risk of denting the photo surface.
Handle photos by their edges whenever possible. The oils from your fingers can leave marks that attract dirt over time.
Consider scanning your most precious photos. Once you have a digital copy, you can look at it anytime without touching the original. This drastically reduces wear and keeps the real thing safe for future generations.